I wanted a cheap cabrio that was homologated for towing, and thought that a C3 Pluriel with a targa conversion would be a great idea. As I wasn't going to use the original (stupid) roof, a car with a buggered one should be really cheap.
When I sobered up, I still thought it was a good idea and found a 115,000 miles example locally with a duff roof for £595. It had a towbar already fitted, so I agreed to pay the full asking price if they agreed to deliver it. This meant that I wouldn't have to tax and insure it before making sure my idea(s) actually worked.
The MkI version consisted of cutting the roof bars in half to use the front sections. An aluminium sheet was cut to replace the original fabric roof section and was riveted to the bars. Inside the roof bars are aluminium tubes about the diameter of scaffolding poles:
By adding a scaffolding swivel clamp and an aluminium scaffold pole to the rear tube of each roof bar, I formed a folding frame that swung the roof onto a rear load bed cover that I fabricated from aluminium checker plate.
Although the MkI version worked, it required a Charles Atlas body-building course to operate it. Also, making the rear deck water-tight where the fulcrum poles passed through it was a real pain.
So, at the end of the first topless summer I created the MkII version (details at the bottom of this site if you prefer its better looks).
I lived with the MkII for the following year, but the requirement to lift the roof (or lower the windows) on exit/entry was a pain. I felt that finding a better way to use the original, shortened roof bars was worth another go.
At this point I did mock-up a roof copying the Ferrari Superamerica "hinge" idea. However, the Ferrari has a flat roof rather than the Pluriel's curved one, so when my roof flipped over onto the deck the inverted banana shape just looked too odd. Also, when down the roof inhibits opening the rear deck.
So, using the MkI's half-length roof bars for easier access and better door sealing, I created the MkIII version which completely dismantles and stows neatly in the boot.
Update: I later revisited the Superamerica idea (MkIV), this time using a flat panel to improve the aesthetics:
However, I went back to the MkIII as although it takes longer to erect (and looks worse), it is far better looking when stowed and just works better all round.
I removed the roof bars, the glass hatch, the roof and its mechanism, and the roof motor.
However, you must keep the roof motor controller (located in the offside of the boot) connected or the ECU complains. Also, you must cable-tie (or solder) the roof micro-switches closed or the car won't lock. I then wrapped all this gubbins in a thick plastic bag and gaffer-taped it up (shown in the picture above) in the now much enlarged bootspace.
With all the roof paraphernalia removed there is far less weight behind the rear wheels, so I removed the two enormous harmonic balancer weights mounted on the chassis, either side of the boot well.
With all this weight removed the performance metrics of "shit" and "shovel" sprang to mind.
MkIII Stowable Roof
Due to a policy of continual improvement, I replaced the 3mm aluminium checker plate of the MkII's rear deck with a lighter, 1.5mm thick, plain aluminium sheet.
To get the shape of the deck I trimmed a cardboard template and then transferred this to the aluminum sheet.
The easiest (and most accurate) way would be to use transparent acrylic or polycarbonate sheet, marking the outline of the boot looking through it and then cut to that line. Obviously, you would have to cover this unless you wanted to advertize the contents of your boot, and that they're only a hammer-smash away if you use the cheaper acrylic sheet.
As I never used them, I permanently removed the folded rear seats as well, created a new boot bulkhead, and liberated even more boot space as a result.
I also added hinges (the type used on uPVC windows) to the rear deck to facilitate easier boot access.
Toolstation.com, 26048, 414 x 13mm, about £9 for a pack of 2
The increased boot space due to removing the rear seats then led to creating a modified roof that could be stowed in the boot.
Also, with the roof stowable the tie-down loops were no longer necessary. I never carried anything on the deck anyway (towbar/trailer geddit?), so I got rid of them as well.
The new lid locks in place using two standard door latches, each operated by lockable garage door handles.
The latches lock under the original roof bar locking plates on each side of the boot. The shafts of the garage door handles fit perfectly into the square holes in the latches.
Toolstation.com, 58386, about £17 each
Toolstation.com, 84559, 76mm, £3.48 each
I then added two automatic latching/unlatching bonnet stays (one on each side), bolted at the bottom to the seatbelt anchorage points.
Carbuilder.com, BNSTY, 300mm- 530mm, £16.80 each
The rubber matting was now not needed, which is a good thing as it weighed quite a lot itself. However, the bright aluminium needed to be darkened.
Paint? Well, matching the car's colour would be nice, but worked out expensive in automotive rattle-cans (plus the primer). Then I had an idea. Wrap.
But this is not a cheap alternative either if you deviate from the standard colours.
Aha! I found that BannerBuzz do large, plastic, UV-proof stickers for lorries and vans in this size for £40.
So I set the background to match the body colour and hey-presto! However, lured by the fact it's the same price
with additional images as without, I got all arty-farty and added faux Citroën publicity pics.
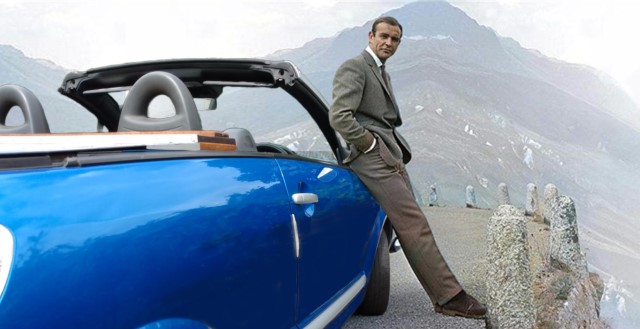
Well, you don't drive a soft-top Citroën if you're shy and retiring, do you?
Pub Quiz: The white cloud in the 1920's picture above is stylistically suggesting:
The girls are watching a passing steam train
The girls have left the car running because they can't hand-crank the bastard
That the tart on the right is blowing Gauloises smoke out of her arse
Hint:"Fumer utiliser votre derrière" is part of the Baccalauréat Français
Where was I? Oh I know. The only gotcha was that I applied the sticker on my own, which is fiddly for such a relatively large area, and ended up with a few unavoidable wrinkles (much like myself). But that's because I'm a cack-handed git and is no reflection on the BannerBuzz people's product.
Obviously, you could leave out the graphics and just use the banner's background colour to match your car. If you want to do this, run a Google search for paint manufacturers that give RGB (Red-Green-Blue) colour codes for your paint, then set that as your background colour in MS Paint (e.g. 10-47-128 for my "Bleu Grand Pavois").
You could take a photo of your empty boot from above and use that. Or add a picture of a large V8 engine. Or Koi Carp in a fishpond. Or, after I forgot Mum's birthday, you could use this picture of me, gagged and bound naked in my own boot, with a lit candle up my arse:
Anyway, here's a timelapse GIF showing the lowering (and raising) of the roof:
I've now got the whole process down to about 2 minutes, but if caught
in a sudden downpour (or on one of our new motorways with no hard shoulder) I carry a large, automatic golf umbrella in the car.
...and here's a pausable (and plausible) movie, with subtitles and a bit more detail:
(Watch and pause the movie above while reading my ramblings below about making the new roof)
Now, get a couple of second-hand roof bars and cut them in half. You can use your original ones if you don't need the 4-seater fallback option, or if you want to mimic Cortés and burn your boats to concentrate your mind on success.
When I say half, I really mean cut them so they match the maximum depth of the roof panel you can fit in the boot. I found a 45° angle between the bottom of the boot bulkhead and where the top of the rear seats used to be gives you the maximum area possible to store a roof panel.
The 45° storage angle also maximizes the remaining boot space (see below), already made larger following the original roof mechanism and glass tailgate vacating their home above the spare wheel and starting a new life together at the back of the garage.
The roof panel is just a sheet of aluminium trimmed to bridge the roof bars. Four captive bolts (topped with stainless steel penny washers and bath-tap rubber washers) hold it to the roof bars.
Next, make a bigger rear screen from polycarbonate sheet. This can then slot into a slot (duh) made from 2 oak battens screwed to an oak plank fixed on top of the boot bulkhead.
The oak plank is secured to the rear passenger grab handles by 2, 1" strip steel "L" brackets and exhaust clamps.
You could rout a slot in the plank, but battens are much easier and also form a sort of dam to stop water entering the cockpit if you park arse-upwards on a hill.
Now, cut the screen in half and add a piano hinge so it can be folded to fit in the boot. I edged the sides of the screen with pipe insulation, which seals against the rear windows and stops the screen halves rubbing against the roof panel (and each other) when they're stored on top of it in the boot.
To support the roof panel, rear screen and the fronts of the two roof bars when stowed in the boot, I cut slots in the ends of an aluminium pole and slid them onto the rear seat top locking loops. I added two aluminium strip loops under the bar to hold up the front of the roof bars. I also wrapped the bar in pipe insulation to stop any chafing or rattles.
The folded rear screen just sits on top of the stowed roof panel. It stays in place due to friction and its own weight. If you drive like a maniac you could always strap it down, or shut your wife in the boot and get her to hold on to it.
I know the above animation is annoying, and does nothing to help the narrative. But I just wanted to show off the fact that I could create it, and start yet another sentence with a preposition.
Yes Mrs. Fox, I was paying attention in your English classes. Not because I was eager to learn, but solely because I thought you were a total MILF. But I think you knew that already (sorry, did the preposition thing again there).
However, to this day, even my text messages are spelt and punctuated correctly, and I would mentally correct a deathbed utterance if it contained a grammar violation. Or should that be "a violation of grammar"?
Thank you.
Panoramic/Moon Roof
For winter use (and if I wanted to use 4 seats) I got two second-hand roof bars for £80 and made a full-length aluminium panel to replace the folding roof:
However, the aluminium roof was hard to seal around the rear window,
so I killed two birds with one stone and replaced all the metal with polycarbonate (5mm x 98cm x 198cm), trimmed at the rear to match the curve of the
boot lid.
It is secured to the inner roof channels with 5 bolts on each side, with the rear section held down by a tab-lock on each side. For strength, the locks
are mounted in the polycarbonate with a strip of aluminium on the outside and aluminium angle on the inside, and their tabs rotate
into slots cut into the roof bars. When the locks are released, the rear section flips up so that the boot release can be triggered.
At over 60 mph the Bernoulli effect starts to lift the leading edge of the polycarbonate in the middle, so two tabs were added on either side of the
aerial to hold it down. Thanks go to Citroën for providing two tapped holes next to the aerial ready for the screws.
And no, I won't be making a sun-blind for the summer (to alleviate the greenhouse effect) since IT'S A BLOODY CONVERTIBLE!
Towbar Swan-Neck Adaptor
When I got the car the towbar swan-neck was missing. Unfortunately, I subsequently found that you cannot buy replacements due to product matching/liability issues and was told "You'll have to buy and fit a whole new towbar Guv".
After my reply of "Bollocks", I fabricated a towball adaptor made from two thick C-Beam sections (Berkshire Metals didn't have any I-Beam offcuts). I cut, drilled and held the C-Sections back-to-back to form a 'T' section, and bolted this into the swan-neck holder. I
then bolted a new, standard towball into this lash-up, sorry, Hi-Tech solution.
Please keep any C-Section jokes to yourself. Thank you.
Superamerica
Based on the Alfa Romeo Vola (shown above, designed by Leonardo Fioravanti), the most numerous use
of this type of folding roof was in the 2005 Ferrari 575 Superamerica:
The Ferrari used an electrochromic glass roof panel that could be darkened electrically.
Replacement roof panels are available to order, but I decided to make my own because I don't have the facilities
to cut the glass to size, and not because the price of the Ferrari part is $79,000.
So, taking some 2" aluminium angle, I knocked up a frame that contained one of those folding temporary table tops.
This gives you a white, injection-moulded polypropylene roof that reflects heat, is double skinned
(air cavities for winter insulation and to resist condensation) and doesn't need painting.
It is also tough enough to deter break-ins (Err, windows? Duh?).
The front of the roof has a 2" aluminium strip curved to match (and overlap) the rubber seal at the top of the C3's
windscreen:
I re-used the folding rear window from the MkII and screwed it to the oak panel. When closed, it is
held to the roof using a large cabin hook (circled):
The front of the roof is held down using smaller cabin hooks, secured with pins
(pop-rivets are handy) passing through small holes drilled into the cabin hooks and the C3 roof-bar latch hooks:
I formed two aluminium hinges that fold the roof so it clears the rear screen when it is folded onto the rear deck,
and screwed them to the oak panel:
Rubber door-jam seals were used to seal the roof sides to the door and rear side-windows.
From the rear, the car now looks like a poor-man's Beetle/Mini cabrio with the roof folded:
Advantages:
Roof can be lowered/raised from within the car
Rapid erection (without medication or Helen Mirren)
Can be used with only the rear window open
Looks good when raised
Disadvantages:
Still looks odd when lowered
Interferes with opening of the rear deck
Reduced rearward vision
Dangerous lack of nearside, rearward vision
Requires 6'9"(>2m) headroom to fold/erect
Hides my rear deck artwork (Tart!).
Even with a flat panel, as a 5'7" short-arse the main problem was the lack of nearside rearward vision,
especially at obtuse angle junctions:
Also, it requires more than 2 metres of headroom to fold/erect, so I cannot
do this in my garage or car-port, or in some underground carparks.
So, back to the MkIII, and my large, automatic golf umbrella for sudden downpours.
Soft-Top Roof
Now don't laugh, but I was looking at a copy of Practical Classics Magazine (wrapped inside a porno mag to save embarrassment) when I noticed that the Morris Minor
convertible has windows curved in a similar way to the Pluriel.
Being a Visio genius, I scaled a technical drawing of the Moggy's roof to that of a Pluriel, and overlayed them.
They weren't similar, they were f*****g identical!
So, I ordered the cheapest Don Hoods jobbie for £200. I planned on building a custom frame as the original Moggy ones are rather expensive,
are currently out of stock, and the only one on eBay was in a worse state than my arteries. But in the words of the great Jeremy Clarkson "How hard can it be?".
Stop Press!
Clue: A fool and his money are easily parted.
Received the Don Hoods hood after a couple of weeks. Really well made, and hard to see how they do it for £200.
Threw it over the car and it fitted like a glove (but not like the O.J.Simpson one), and just needed a bit of trimming at the back rather than extending.
Carried along by my own excitement, I then ordered a new frame for £460. I suppose I could have made my own, but 3-dimensional folding roof mechanisms are best left to major car companies.
Ah.
It did fit (well, sort of), and I always knew some fettling was going to be required. And to be fair, £660 all in was still very good value when you actually saw the complexity of both frame and the hood close up.
However, six things then hit me:
1) The sealing around the windows would be much inferior to my new, folding, MkIII roof, which used the original Citroën roof bars (see here)
2) When I sat down and watched the video on how you fold my new Morris Minor roof, I discovered that you have to detach the hood from the frame at the front, stand on the rear seats, hold the hood up (Count Dracula style), roll it up, then fold the roof frame on top of it
3) The frame and hood weighed far more than my MkIII roof
4) My MkIII roof was a far more secure hard-top
5) My MkIII roof could be lowered and stowed more quickly than the Morris Minor roof
6) The folded soft top reduced rearward vison markedly, especially for short-arses like me
Bugger! Point (2) showed that I should have watched the video before buying the frame, not after.
So, if you want 4 seats in your Pluriel and a soft top, then I know where you can get a starter kit for half price. Or, if you own a Morris Minor...
Whilst on the subject of Darwinian dead ends, here's a couple more.
I bought a pattern-part serpent roll bar meant for the Mazda MX5.
Now, I know they're only cosmetic but they're also only £80 and all I wanted it for was to support a bikini roof like this one:
However, the bikini roof would have had the same problem as the MkII roof in that it overlaps the door windows. Also, the serpent roll bar looked stupid.
Following this failure, who'd be dumb enough to buy a pickup truck loadbed rollbar like the one below?
Again, it was only about £80, which seems to be my trigger amount for latenight, drunken internet purchases.
Offered it up, but this time it not only looked stupid but how would I open the rear deck?
Still, demonstrating incompentence and profligate spending, I must be a front runner to be the next UK Prime Minister.
DAB Radio & Homemade Remote
To bring Belle End up to date in the audio department, I fitted a cheap Sony DAB radio (£99).
You'll need the Citroën radio extraction tools, an adaptor to convert the wiring harness to match the Sony radio and a DAB windscreen aerial. All these are available at Halfords and there are good fitting guides on the interweb.
However, the Citroën steering column remote control was now useless, and the plethora of small Sony buttons, my monkey mits and my irrational desire to keep my eyes on the road meant I needed a new remote.
Luckily, Sony radios come with a 3.5mm "stereo" socket at the back to connect one of their remote control units. Unluckily, I couldn't find one. Luckily, I'm a genius (and modest too) and found that they just use a simple resistance logic.
I already had a mixed bag of resistors, so I just needed to pop down to Halfords and buy 5 starter buttons.
I also had some aluminium plate left over from making the brackets for the latching bonnet stays above, but any piece of flat wood would suffice.
I used starter buttons because they are non-latching, are big and easy to find by feel, and lend a bit of 007 DB5 cachet. Really nice, but at £8 each they came to 40% of the cost of the radio. Ouch!
I cut the plate to a size that just wedges in the odds&sods cubbyhole under the radio, and wired the switches thus:
I configured the "+" buttons as the upper ones, but lay them out in whatever pattern you find most intuitive.
If you want more functions (e.g. to change USB music folders), get some smaller buttons and Google "sony car remote resistors". Although, too many small buttons and you're back where you started from.
I may work out how to adapt the Citroën steering column remote, but this way I can still fall back to the original radio (which you have to do to change the C3's clock).
The MkII
Although I'm happy with the MkIII roof when down and stowed in the boot, aesthetically the MkII looks better with the roof up. Does that make me a "Tarte au Citroën" rather than a "Belle End"?
So, below are details of the MkII construction in case it is more to your taste.
Note:
For simplicity, the sides of the MkII roof overlap the tops of the windows. When you get out of the car, you must lower the window (or slightly raise the roof) to open the car door. When you enter the car, you have to lift the roof to clear the window. I was going to make a remote control to lower the window from outside the car, but the MkIII roof (using the shortened Citroën roof bars) solves this problem, as well as being storable in the boot.
MkII Roof
The roof is formed from three plywood sheets forming an inverted "snow-shovel" affair. To get the curve, I hand/knee formed three 15mm x 82cm copper tubes to match the curve of the side windows. These tubes are then screwed to the center plywood sheet using plastic pipe clips.
The side sheets overlap the side windows, and were secured to the main sheet using 1 inch wide, 90 degree brackets flattened in a vice to an obtuse angle and screwed to each sheet. These allow the side panels to be adjusted to seal over the window tops. When the angles are OK, the sheets can be "taped" using aluminium mesh strips (cut from car body repair sheets) pushed into the angle and glued with builder's adhesive ("No-More-Nails" etc.).
I wanted to use ordinary rexine material for the roof covering, but the screw heads would have shown through. To fix this, I glued sheets of builder's floor protector as a waterproof underlay on the plywood sheets before covering them with the rexine.
At the rear of the roof I fixed a wooden batten that creates a slot to secure the folding rear screen in the upright position. It also allows two rubber bungs to be attached to the roof to support it when stowed on the deck.
Where the rear of the roof sits on the rear side windows, I glued 3cm lengths of narrow aluminium C-section to securely locate the roof.
I also created a hasp from 3mm aluminium sheet and screwed it to the batten. From Wickes I sourced a galvanized staple on a plate with four holes, which I riveted to the rear of the deck. This then passes through the hasp and enables the roof to be padlocked to the deck, preventing theft of the roof and decapitation by it should you use the car for wind-in-the-hair ram-raiding.
The slight flex in the deck allows my monkey mits to access the rear bootlid release (as shown above). This will be supplemented later with a remote bootlid release switch.
The roof is topped off with a door-pull handle to make carrying easier (i.e. hold it like a Roman shield).
The only bugbear is the fact that to make a watertight seal the roof overlaps the front windows. To enter the car, you must first lift the rear of the roof slightly so the door window clears the roof lip. Once inside the car the window can be lowered, the door closed and then the window raised. The MkIII version will mimic the original roofbars by sealing from inside the front windows and, hopefully, split into sections so it can be stored inside the boot, possibly clipped to the underside of the rear deck.
Securing the MkII Roof to the Cabin
The front of the nearside and offside roof tubes are secured to the plastic pipe clips with horizontal screws. This enables cable-ties to be used to secure the roof/tubes to the windscreen securing tangs.
Securing the MkII Roof to the Deck
Fortunately, the width of the front of the roof (i.e. 114cm or the width of the top of the windscreen surround) is less than the width of the bottom of the rear side windows and enables the side windows to function with the roof stowed on the deck.
To hold the roof on the deck at the front, I made two pillars with pipe clips on top. The roof tubes can then be clipped into the pillars.
MkII Boot Bulkhead
To stop miscreants accessing the boot contents with the roof removed, I screwed a plywood panel to the front of the deck and covered both sides with car carpet.
The panel rests on the folded rear seats, and the front of the deck is held down by cable-ties threaded through the rear grab handles. The cable-ties are tightened so that the rubber door seal on the deck compresses just enough to seal, but not too much so that it is completely flattened.
This operation, being done by crawling into the now covered boot, required the use of selected, four-letter, Anglo-Saxon expletives. These can be obtained by telephoning me at 4am on any morning.
MkII Rear Window
A rear screen was created by obtaining a polycarbonate sheet cut into a trapezoid (136cm base, 116cm top, 28cm height) to approximate the curve of the rear side windows. It is secured to the deck with a piano hinge sitting on an oak batten sealed with silicon sealer. This batten creates a water dam to direct deluges away from the cabin.
The car can be driven with the roof on and the screen folded down, but the raison d'etre for the folding screen is that it folds under the roof when it is stowed on the deck.